dbt (data build tool)는, 데이터 웨어하우스에서 Transform 작업을 도와주는 툴입니다.
![]()
dbt에 대한 자세한 내용은 이미 다른 분들이 자세히 정리해주셔서 참고하시면 좋을 것 같습니다.
이번 포스트에서는, dbt를 이용해서 GCP bigquery에서 데이터 마트를 만들고자 합니다.
Data 준비하기
개인 데이터가 있으면 좋겠지만, 그렇지 않다면, dbt-labs에서 제공해주는 jaffle_shop 튜토리얼이 있습니다.
해당 레포에 데이터를 Clone하여 사용할 예정입니다.
git clone https://github.com/dbt-labs/jaffle_shop
dbt 설치하기
dbt를 사용하기 위해서는 dbt를 설치해야 합니다.
dbt docs 설치하기 를 보면, Homebrew를 이용한 방식과, pip를 이용한 방식을 설명하고 있습니다.
본 포스트에서는, brew 방식을 이용해서 설치하고자 합니다. (m1 mac사용하고 있는데, pip로 설치할때, 몇몇 오류가 발견되고 있습니다.)
brew tap dbt-labs/dbt
brew install dbt-bigquery
dbt에서 지원하고 있는 어댑터는 아래와 같습니다.
- Postgres
- Redshift
- BigQuery
- Snowflake
- Apache Spark
설치하기 원하는 어댑터에 따라, brew install dbt-<adapter> 로 설치할 수 있습니다.
dbt --version
dbt 설치가 완료되면, 위의 명령어를 통해 테스트 합니다.
dbt Core 및 dbt adapter 버전정보를 확인 할 수 있습니다.
GCP Service Account
dbt를 BigQuery에서 사용하기 위해서 이에 따른 권한이 필요합니다.
- oauth
- service account
권한을 부여하는 방법은 위의 두가지 방법입니다.
dbt에서는 oauth를 사용하는 방식을 권장하고 있지만, 이번 포스트에서는 service account를 사용할 예정입니다.
GCP - IAM 및 관리자 - 서비스 계정에서 새로운 서비스 계정을 생성해 줍니다.
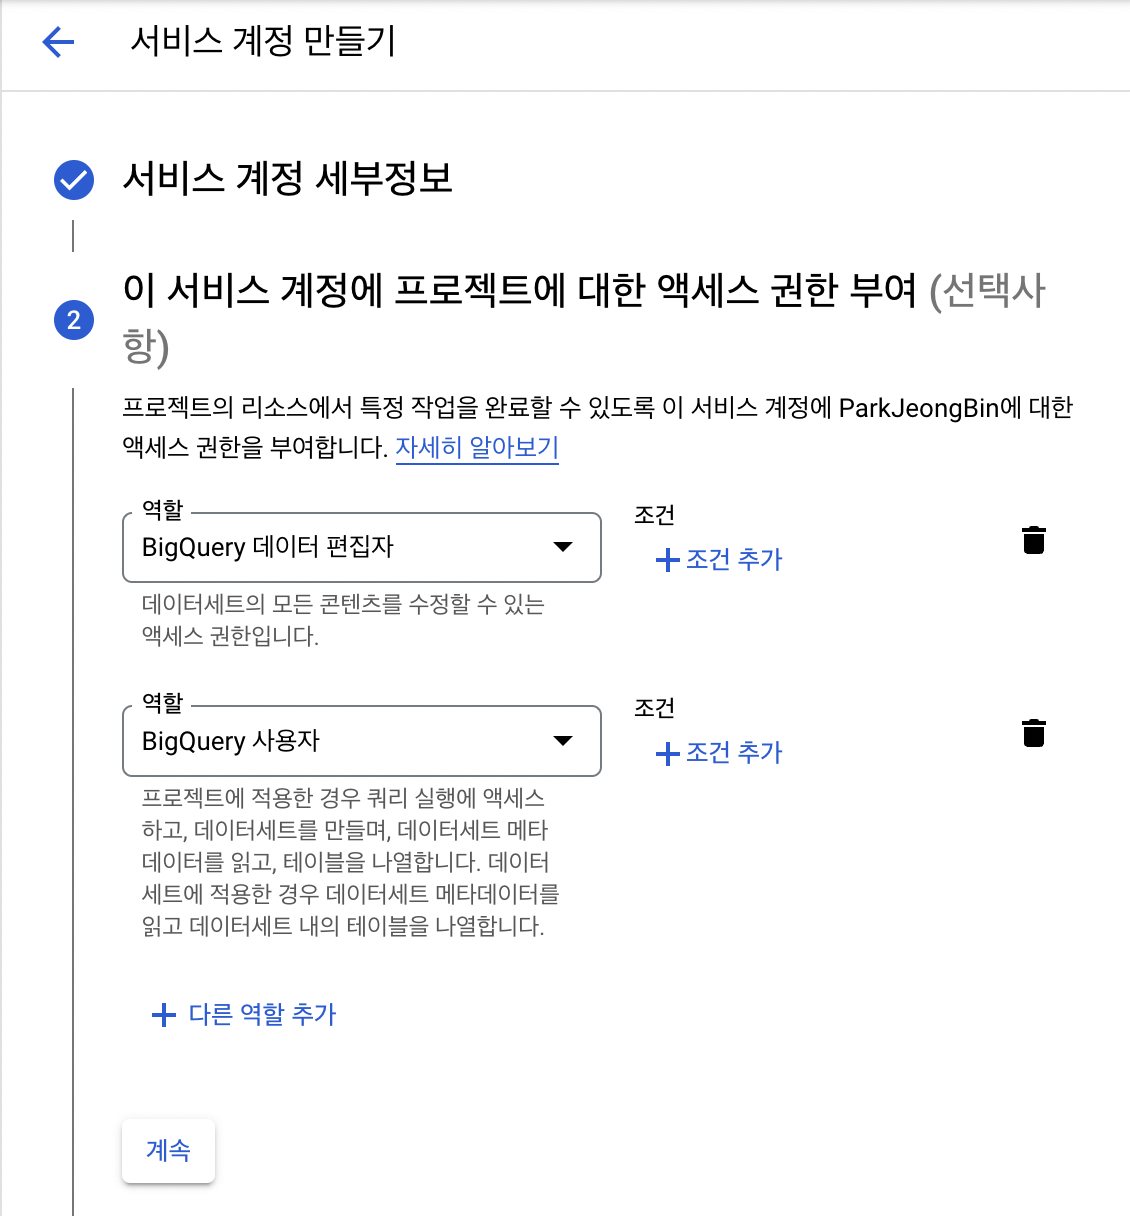
필요한 권한은 아래와같이, 두가지입니다.
- BigQuery Data Editor
- BigQuery User
이후 JSON 형태의 service-account key를 생성하고 해당 파일을 다운로드합니다.
다운로드한 파일을 jaffle_shop 폴더에 넣어줍니다. (경로를 따로 지정할 수 있지만, 편의상 dbt root와 동일하게 위치시켰습니다.)
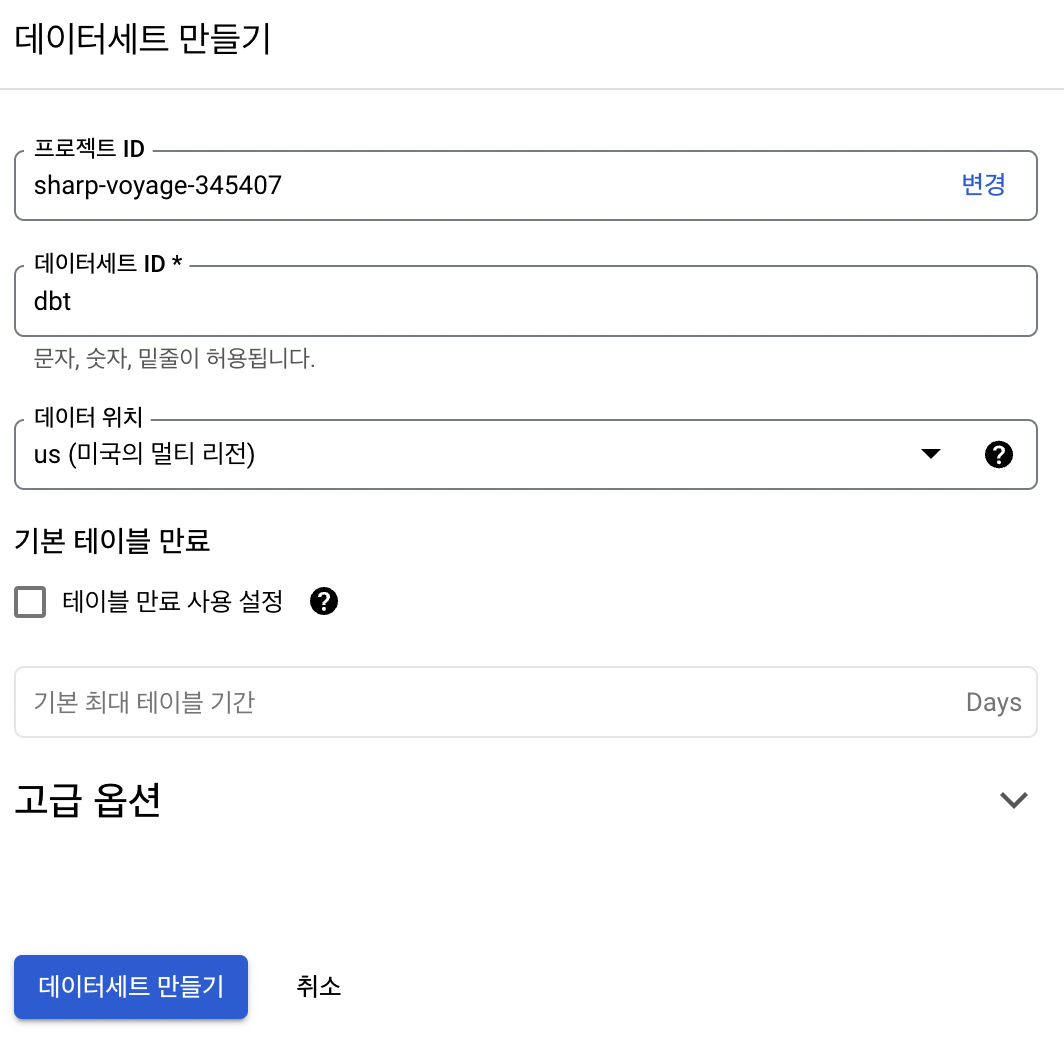
BigQuery Dataset 생성
dbt를 사용하기 위해, Dataset을 생성해줍니다.
GCP - BigQuery에서 간단하게 Dataset을 생성할 수 있습니다.
dbt 셋팅
위의 단계를 통해 dbt 설치가 완료되었다면, 이제 dbt 설정을 셋팅할 시간입니다.
clone한 repo에 들어가서, 아래 명령어를 통해 초기화를 진행합니다.
dbt init
$ dbt init
08:20:58  Running with dbt=1.2.1
08:20:58  Setting up your profile.
Which database would you like to use?
[1] bigquery

(Don't see the one you want? https://docs.getdbt.com/docs/available-adapters)

Enter a number: 1
[1] oauth
[2] service_account
Desired authentication method option (enter a number): 2
keyfile (/path/to/bigquery/keyfile.json): sharp-voyage-345407-16836b6fad46.json
project (GCP project id): sharp-voyage-345407
dataset (the name of your dbt dataset): dbt
threads (1 or more): 1
job_execution_timeout_seconds [300]:
[1] US
[2] EU
Desired location option (enter a number): 1
08:21:39  Profile jaffle_shop written to /Users/check/.dbt/profiles.yml using target's profile_template.yml and your supplied values. Run 'dbt debug' to validate the connection.
위와 같이 셋팅하는 내용이 나오는데, 사용하는 환경에 맞게 입력해주면 됩니다.
셋팅이 완료되면, ~/.dbt/profiles.yml 에 입력한 내용에 대한 yaml 파일이 생성되어 있음을 알 수 있습니다.
dbt debug
위의 명령어를 통해 잘 셋팅 되었는지 확인 할 수 있습니다.
해당 과정을 미리 yaml파일로 정의 하고 싶다면,
# profile_template.yml
fixed:
  dataset: dbt
  job_execution_timeout_seconds: 300
  keyfile: sharp-voyage-345407-16836b6fad46.json
  location: US
  method: service-account
  project: sharp-voyage-345407
  type: bigquery
  threads: 1
jaffle_shop 폴더에 profile_template.yml 파일을 생성하고, 원하는 내용을 입력하면, 값을 입력하는 과정을 생략할 수 있습니다.
물론, prompt를 통해서 원하는 값을 추가 입력 받는 것 또한 가능합니다.
seeds
jaffle_shop 폴더를 보면, seeds라는 폴더가 있습니다. 폴더안에는 3개의 csv가 존재합니다.
raw_customers.csvraw_orders.csvraw_payments.csv
테스트를 위해서 dbt-labs에서 준비한 데이터입니다. (bigquery에서 사용할 다른 데이터가 있다면 다른 데이터를 사용하셔도 됩니다.)
해당 데이터들을, dbt seed명령어를 통해서 bigquery로 전송할 수 있습니다.
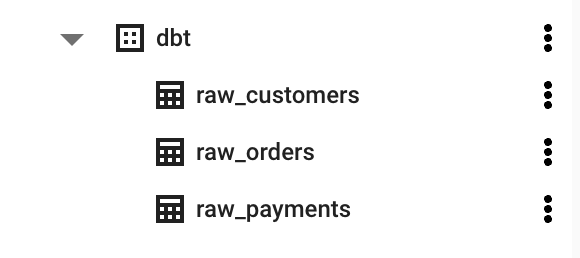
BigQuery를 보면 위와 같이, 데이터 테이블들이 생성되어있음을 알 수 있습니다.
run
이제 본격적으로 dbt를 사용할 시간입니다.
이를 위해서 models 폴더를 볼 필요가 있습니다.
# models
.
├── customers.sql
├── docs.md
├── orders.sql
├── overview.md
├── schema.yml
└── staging
    ├── schema.yml
    ├── stg_customers.sql
    ├── stg_orders.sql
    └── stg_payments.sql
폴더 구조를 보면 데이터 마트를 위한 테이블 외에도, staging 테이블을 구성하는 yml 및 sql 파일을 볼 수 있습니다.
스테이징 테이블 사용 이유에 대한 내용은 다른 글을 참고하시길 바랍니다.
먼저 yaml 파일에는 생성할 데이터마트에 대한 내용의 스키마를 정리합니다.
# schema.yml
version: 2

models:
  - name: customers
    description: This table has basic information about a customer, as well as some derived facts based on a customer's orders

    columns:
      - name: customer_id
        description: This is a unique identifier for a customer
        tests:
          - unique
          - not_null

      - name: first_name
        description: Customer's first name. PII.

      - name: last_name
        description: Customer's last name. PII.

      - name: first_order
        description: Date (UTC) of a customer's first order

      - name: most_recent_order
        description: Date (UTC) of a customer's most recent order

      - name: number_of_orders
        description: Count of the number of orders a customer has placed

      - name: total_order_amount
        description: Total value (AUD) of a customer's orders

...(이하 생략)
name에는 생성할 데이터 마트의 이름, description에 해당 테이블에 대한 설명을 입력합니다.
이후 colums에 생성할 컬럼의 이름 및 설명을 정의합니다.
여기서 특별히 test 라는 내용이 존재하는데, 이는 dbt의 장점인, 해당 테이블에서 확인해야할 test를 정의합니다.
해당 test를 바탕으로, 이후 dbt test의 결과를 출력합니다.
with customers as (
    select * from {{ ref('stg_customers') }}
),

orders as (
    select * from {{ ref('stg_orders') }}
),

payments as (
    select * from {{ ref('stg_payments') }}
),

customer_orders as (
        select
        customer_id,
        min(order_date) as first_order,
        max(order_date) as most_recent_order,
        count(order_id) as number_of_orders
    from orders
    group by customer_id
),

customer_payments as (
    select
        orders.customer_id,
        sum(amount) as total_amount
    from payments
    left join orders on
         payments.order_id = orders.order_id
    group by orders.customer_id
),

final as (
    select
        customers.customer_id,
        customers.first_name,
        customers.last_name,
        customer_orders.first_order,
        customer_orders.most_recent_order,
        customer_orders.number_of_orders,
        customer_payments.total_amount as customer_lifetime_value
    from customers
    left join customer_orders
        on customers.customer_id = customer_orders.customer_id
    left join customer_payments
        on  customers.customer_id = customer_payments.customer_id
)
select * from final
sql 파일에서는, 쿼리할 내용을 정의합니다.
이는 sql파일이기에, sql를 자주 사용하시는 분들은 쉽게 이해할 수 있는 구조입니다. (저는 SQL에 대한 지식이 많이 부족해서 조금 찾아봐야겠네요…)
이점이, dbt의 강한 장점으로 작용합니다. (데이터 엔지니어 뿐만 아니라 sql를 다룰수 있는 분이라면 간단하게 데이터 마트를 만들 수 있다.)
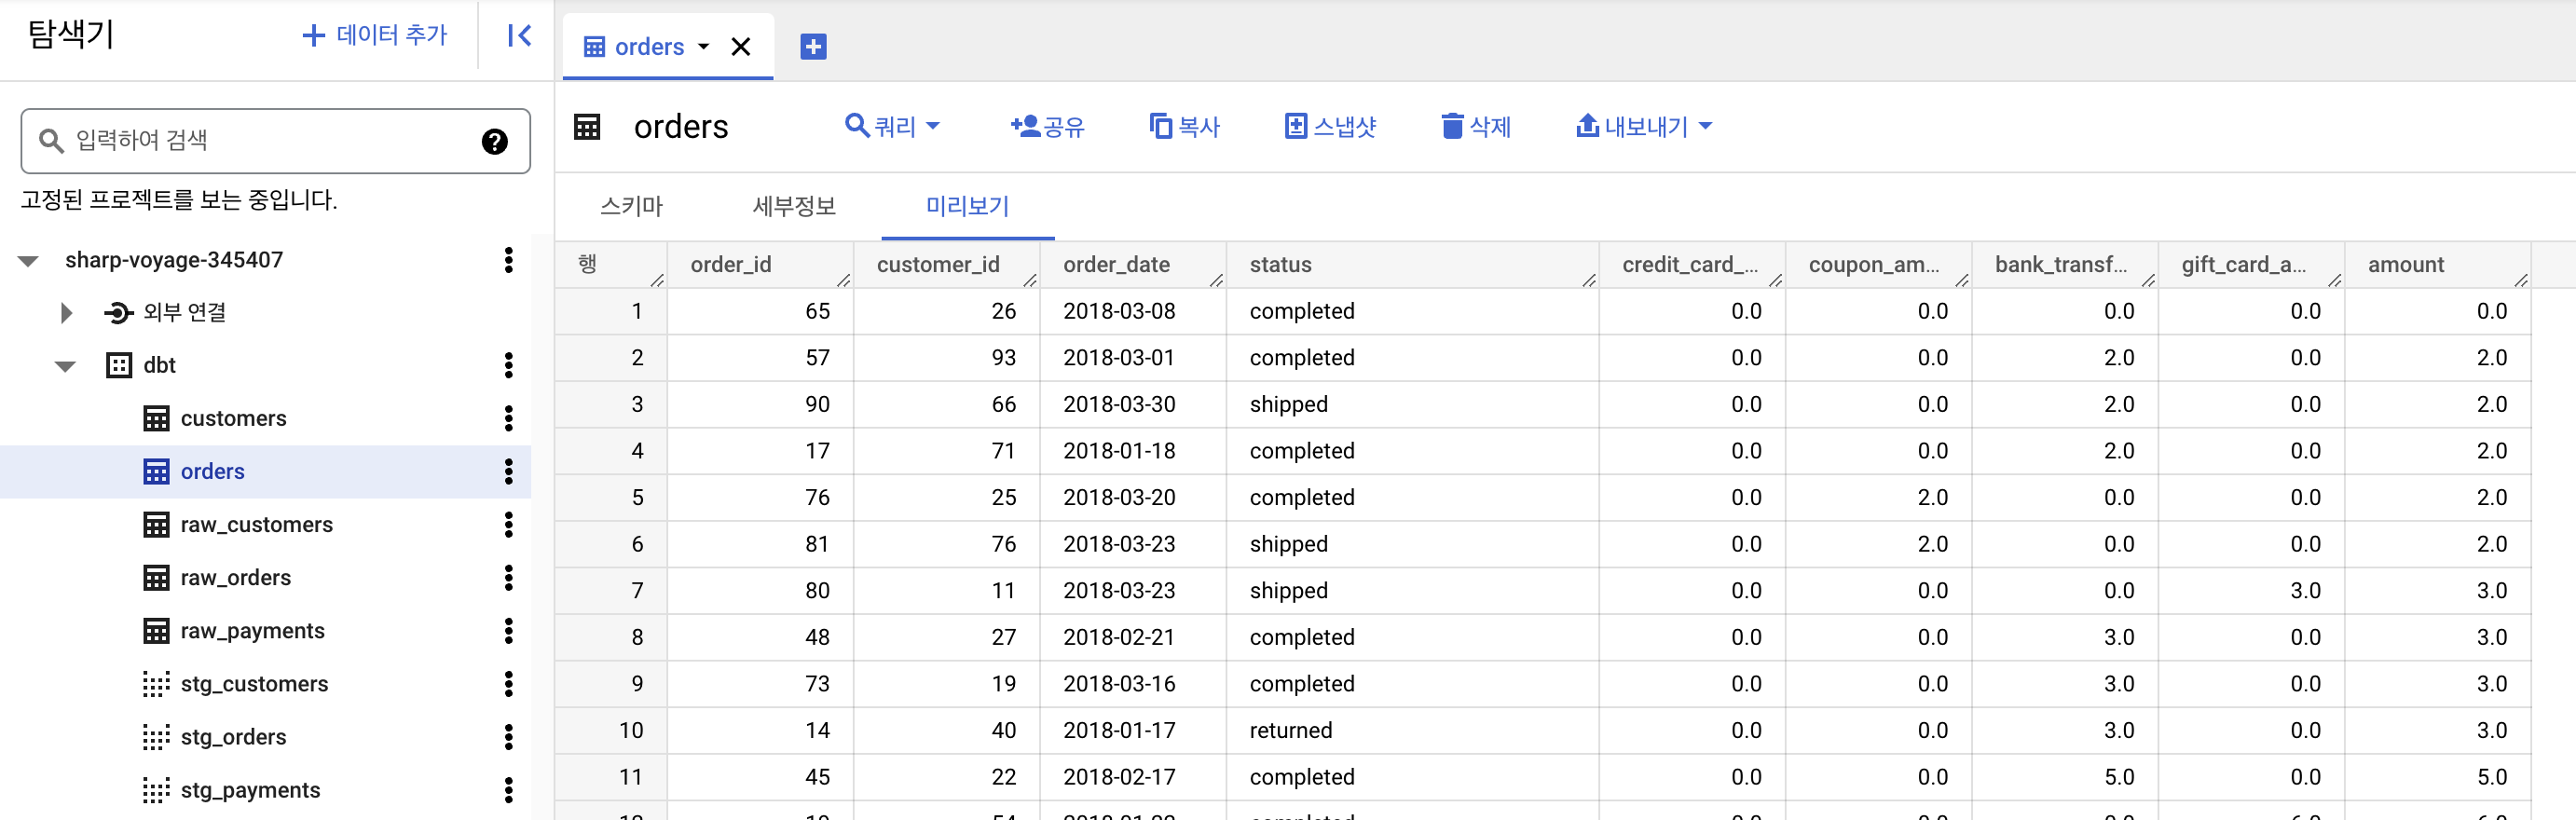
위와 같이 정의가 완료되었다면, 이를 실행하는 명령어는 간단합니다.
dbt run
위의 명령어를 통해서 정의한 sql 및 yml에 따라서 데이터 마트를 생성합니다.
test
dbt의 강점 중 하나인 test 단계입니다.
데이터가 잘 되어있는지 확인 할 수 있는 단계이지요.
이전에 models 폴더에서 schema.yml를 통해 test 정의한 내용이 기억 나실겁니다.
해당 내용을 바탕으로 설정한 내용을 검증합니다.
dbt test
위의 명령어를 통해 실행합니다.
09:00:51  20 of 20 PASS unique_stg_payments_payment_id ................................... [PASS in 2.29s]
09:00:51
09:00:51  Finished running 20 tests in 0 hours 0 minutes and 52.09 seconds (52.09s).
09:00:51
09:00:51  Completed successfully
09:00:51
09:00:51  Done. PASS=20 WARN=0 ERROR=0 SKIP=0 TOTAL=20
이를 통해 최종적으로 몇개가 PASS되고, 몇개가 실패했는지 등을 표시해줍니다. (데이터 검증)
models:
    columns:
      - name: first_name
        description: Customer's first name. PII.
        tests:
          - unique
만약 schema.yml파일에서, first_name의 tests로 unique를 주고 dbt test를 실행한다면,
09:14:16  17 of 21 START test unique_customers_first_name ................................ [RUN]
09:14:18  17 of 21 FAIL 19 unique_customers_first_name ................................... [FAIL 19 in 2.39s]

...(중간 생략)

09:14:28
09:14:28  Finished running 21 tests in 0 hours 0 minutes and 51.72 seconds (51.72s).
09:14:28
09:14:28  Completed with 1 error and 0 warnings:
09:14:28
09:14:28  Failure in test unique_customers_first_name (models/schema.yml)
09:14:28    Got 19 results, configured to fail if != 0
09:14:28
09:14:28    compiled SQL at target/compiled/jaffle_shop/models/schema.yml/unique_customers_first_name.sql
09:14:28
09:14:28  Done. PASS=20 WARN=0 ERROR=1 SKIP=0 TOTAL=21
위와 같이, first_name unique테스트가 실패했다고 뜨고, 최종적으로 1개의 error가 났음을 파악할 수 있습니다.
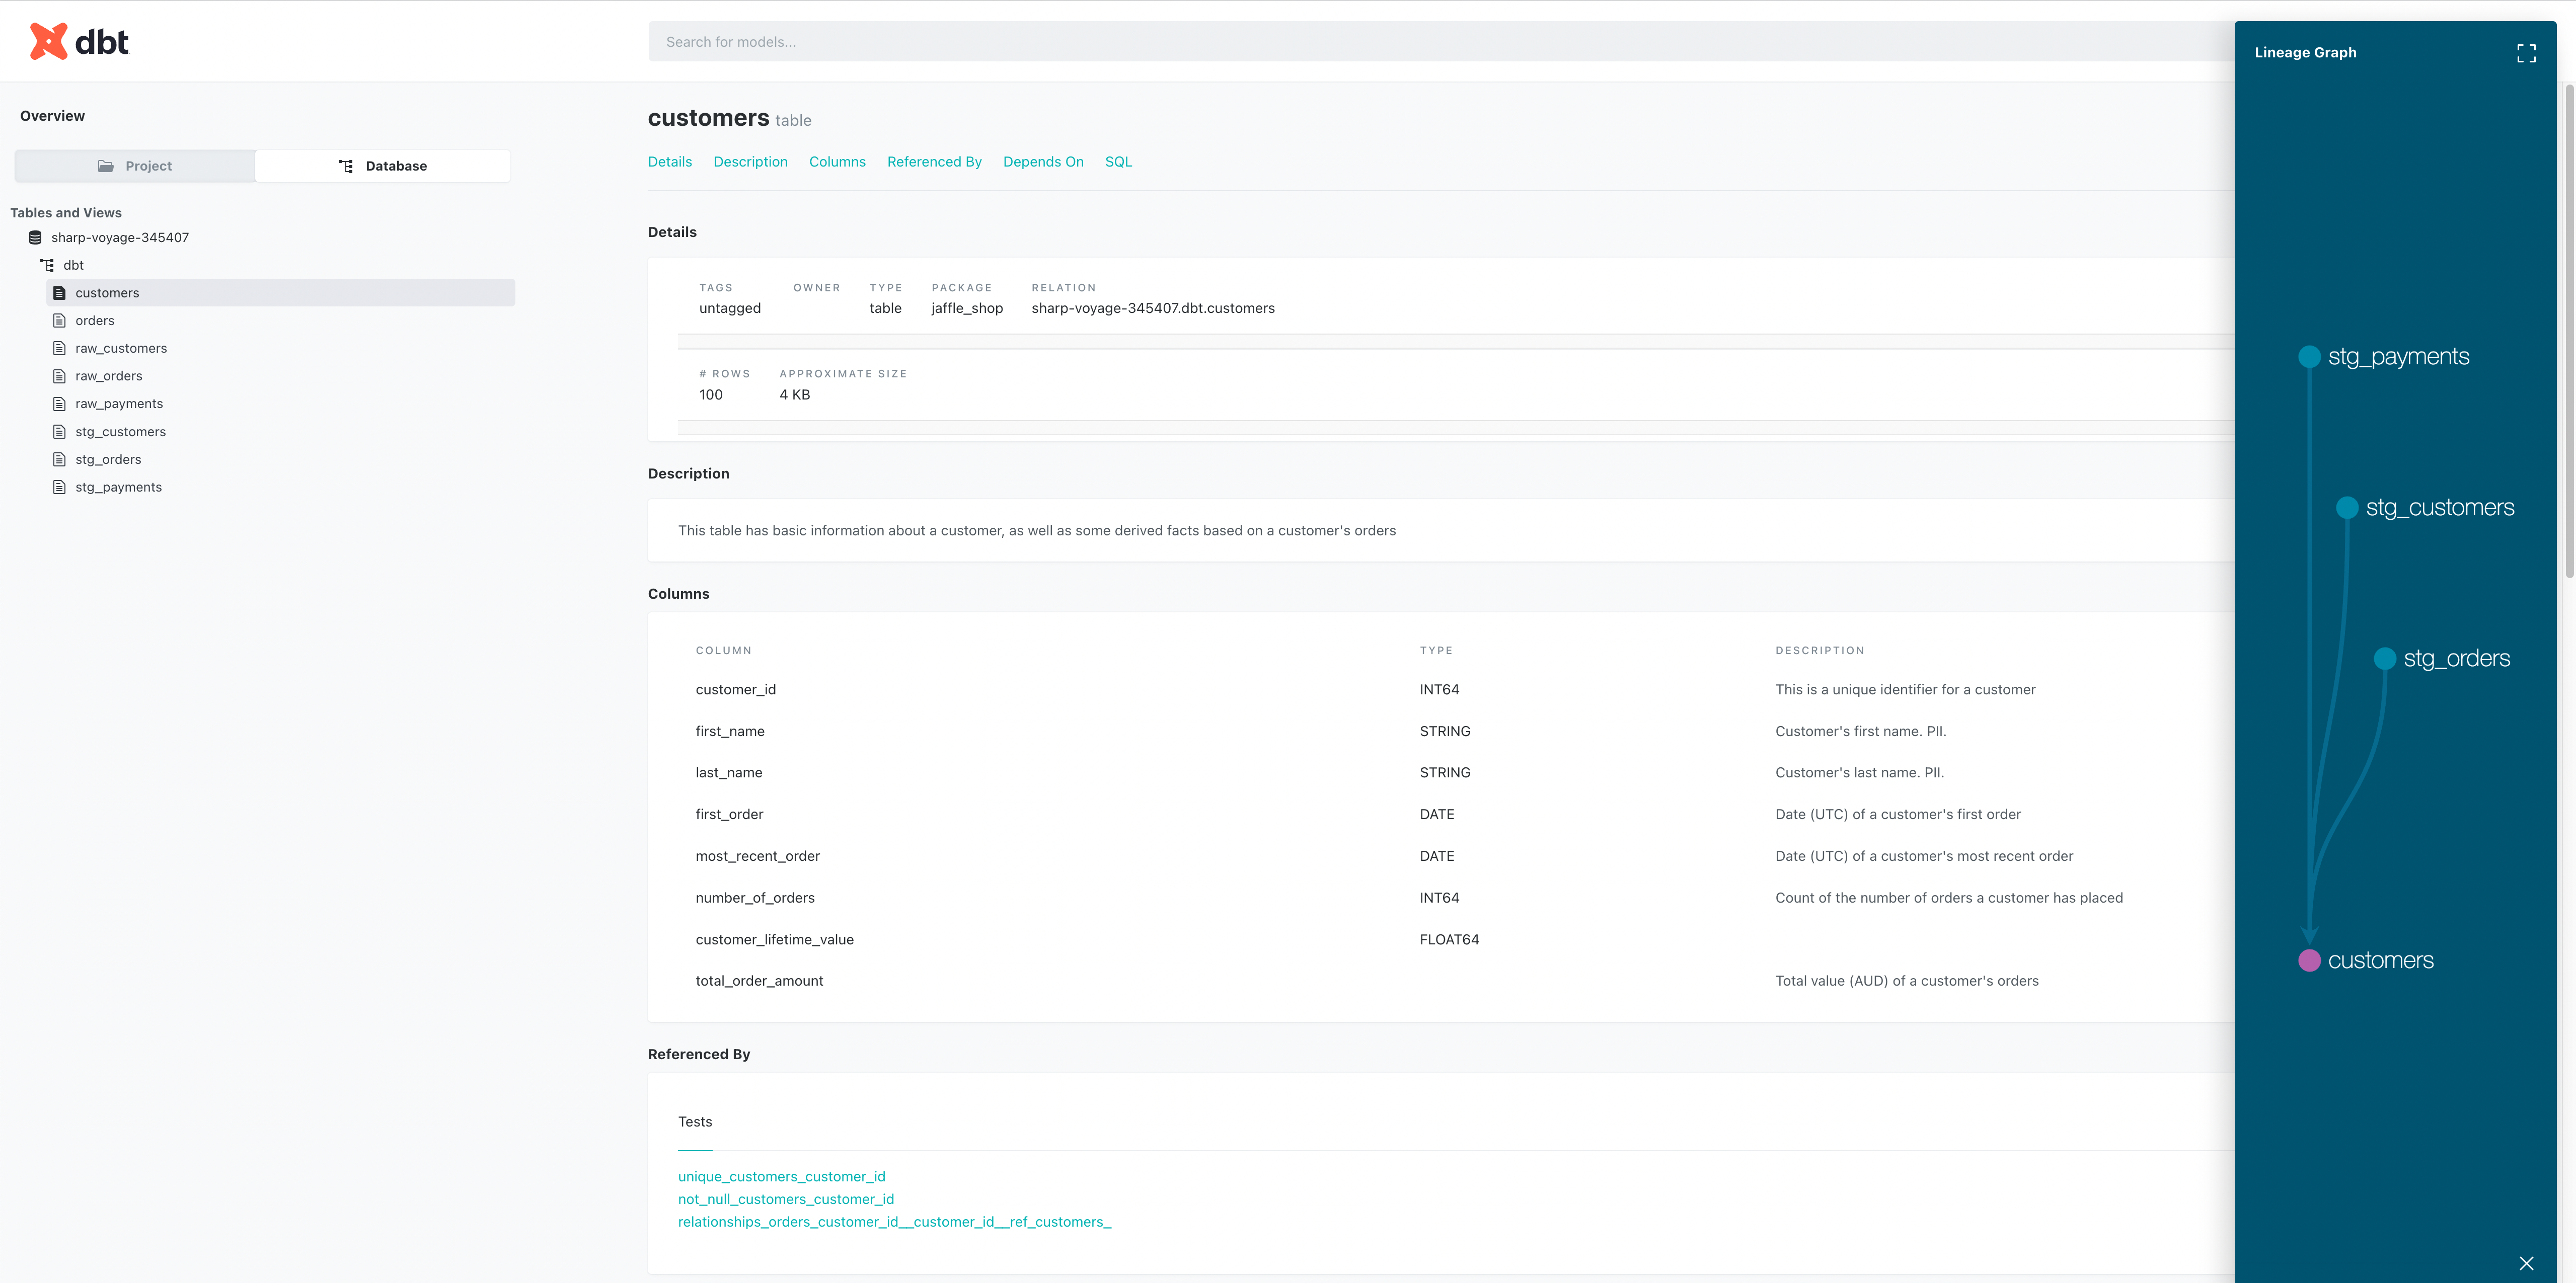
UI
dbt는 설정한 내용을 확인할 수 있는 UI를 제공하고 있습니다.
dbt docs generate & dbt docs serve
위의 명령어로 간단하게 웹사이트를 통한 정보를 확인할 수 있습니다.
이상으로, 데이터 웨어하우스에서 Transform 작업을 도와주는 강력한 툴 dbt에 대해 알아봤습니다.
이를 유용하게 사용하기 위해서는 더 공부할 필요가 있어보입니다.